

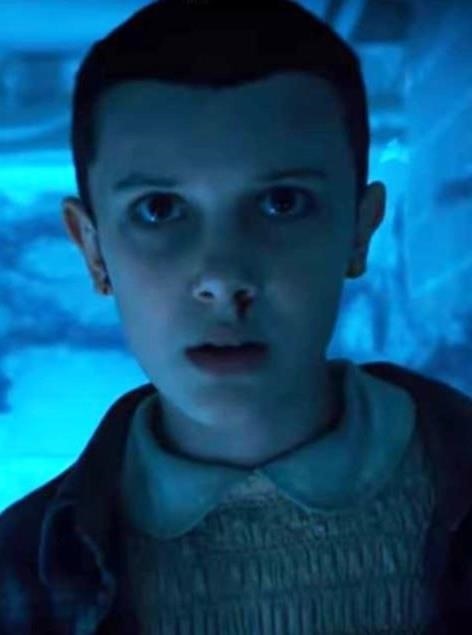
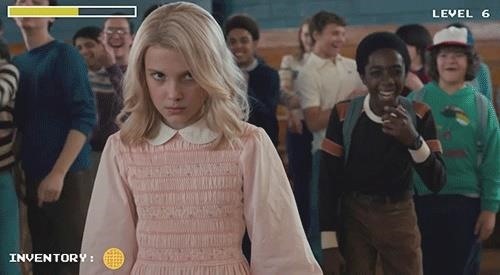
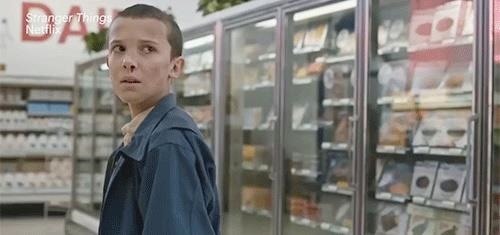
Since its debut, retro thriller Stranger Things and its characters have become ingrained in our popular culture — especially the telekinetic Eleven. For cosplayers, it didn't take long before they grabbed their boxes of frozen Eggo waffles, blonde wigs (or bald caps), and pink smocked dresses to transform into El herself.
From Comic-Con to Halloween, you're sure to find an army of Elevens walking about, and this All Hallows' Eve, why not join in on the fun?! The fact that season 2 of Stranger Things will premiere days before October 31 should also add some extra buzz for Eleven costumes — and really any costume inspired by the squad from Hawkins, Indiana.

Piecing Together Eleven's Iconic Look
Eleven's costume is actually one you can throw together at the last minute, as there are no special aspects to it that may be difficult to find, like say Dorothy's ruby red slippers. Jane Ives does have some specific items for her look, of course, but variations on the theme could work well. Very well in fact, since you'll be able to stand out among the Eleven crowd. Also, if you're going for the season 2 look, it's even easier to put together.
Things You Will Need for the Season 1 Eleven:
- a blush pink smocked, flare dress with a white Peter Pan collar
- a navy blue windbreaker
- tube socks (calf-high) with green/yellow bands
- white Converse (preferably high-tops)
- a box of frozen Eggo waffles
- a blonde wig
- fake blood to recreate Eleven's trickling nosebleed
Note that if you find the perfect dress but it doesn't have a Peter Pan collar, you can always add one on as an accessory. You could also wear a white-collared shirt inside your dress as you would a sweater.
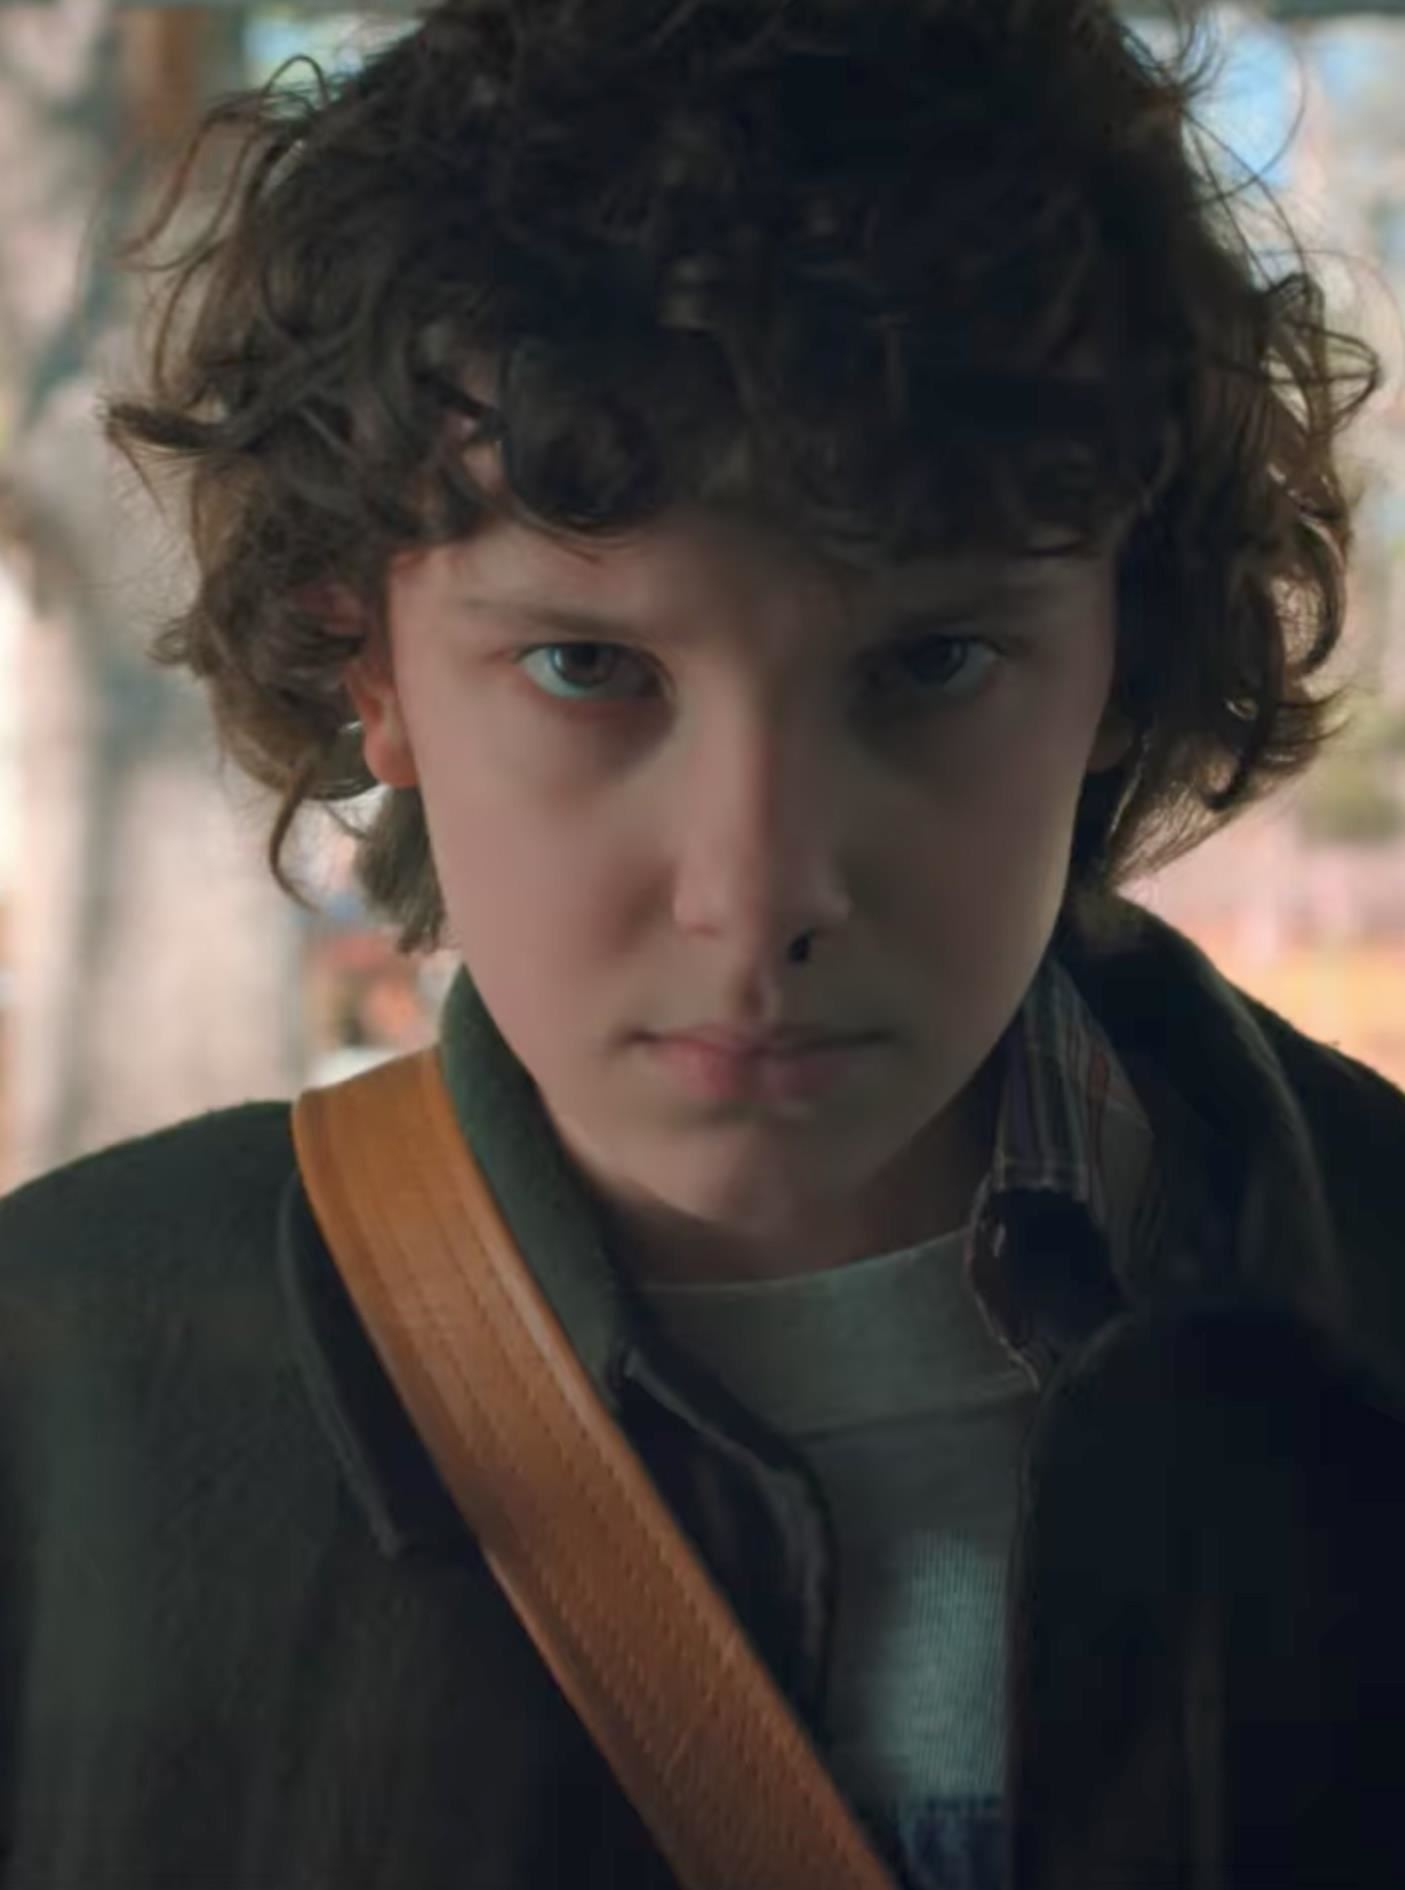
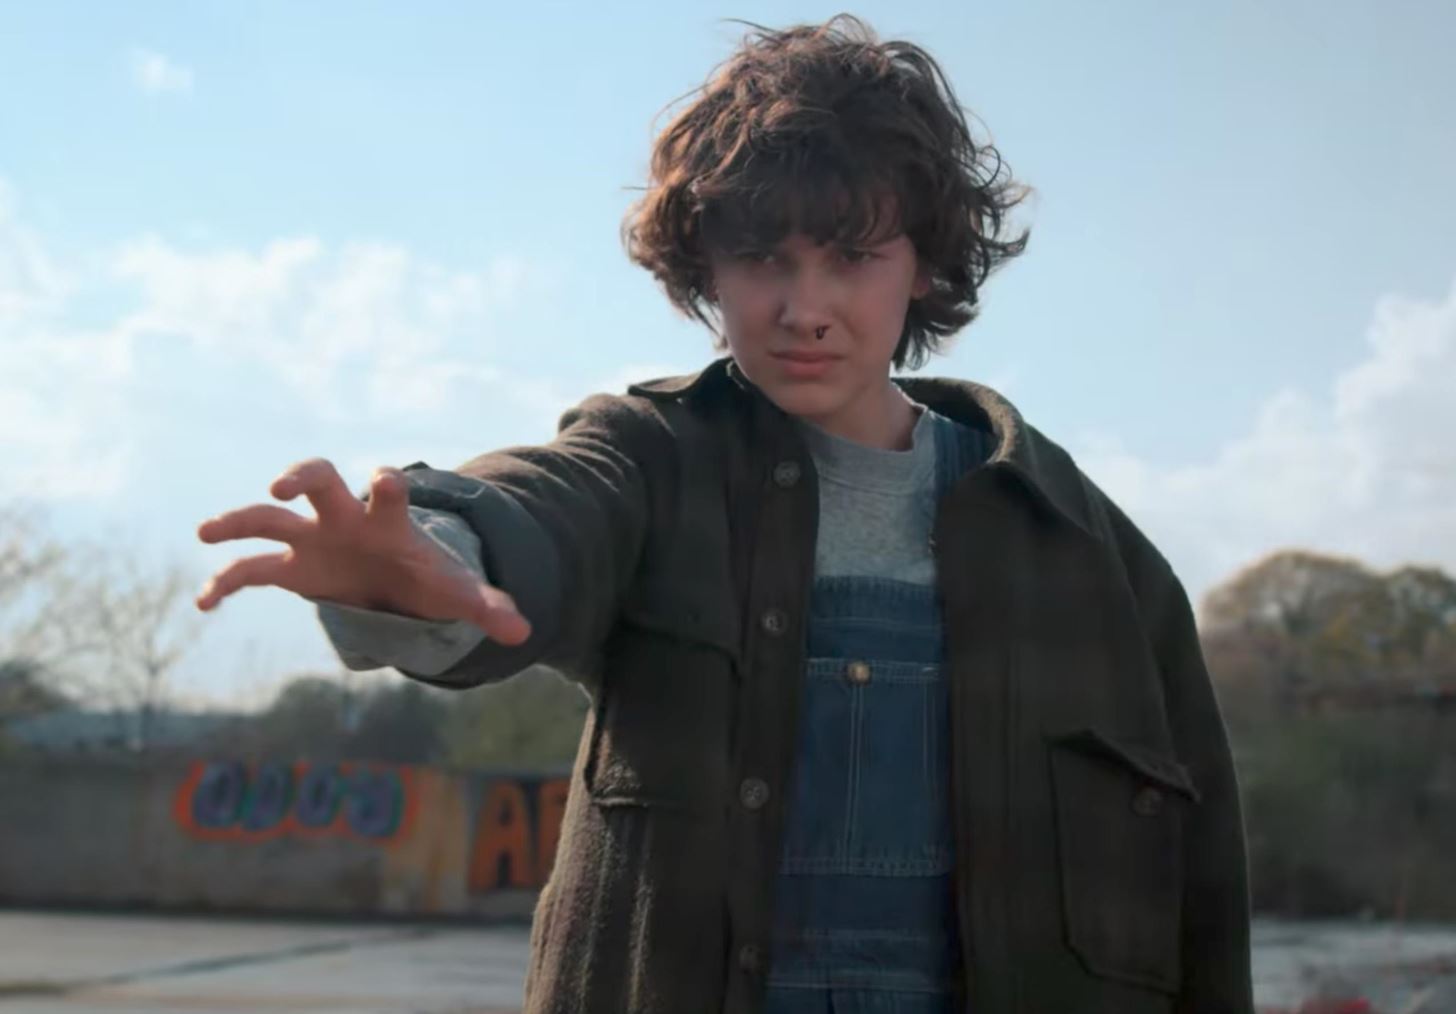
Things You Will Need for Season 2's Eleven
As seen in the season 2 trailer, Eleven's look is much different and even easier to pull off. So much so that we won't even go into further details on the costume. Just the things you'll need:
- a gray long-sleeved sweatshirt
- a long-sleeved flannel shirt
- denim overalls
- brown overcoat with large button pockets on the chest
- all-white sneakers
- curly brown hair
- leather shoulder bag
- fake blood to recreate Eleven's trickling nosebleed
Getting Eleven's Season 1 Look Right
YouTuber Tess Christine offers tips on how to DIY an Eleven costume from season 1, as well as how to pull off a Stranger Things group look (with Mike, Dustin, and Lucas) and even how to become the alphabet wall of the Byers home. For bargains, Tess recommends visiting thrift shops. She found her Eleven dress at a thrift store for $4 and as we explained above, she added on the collar herself.
But What of Eleven's Buzz Cut?
As you can see, creating Eleven's season 1 look is pretty simple, and you can do so with little prep time. If you order your items online, you'll, of course, need to account for shipping, but as for getting ready on the day, you can do so in minutes ... so long as you go the blonde wig route (or already have one of her two styles).
However, if you wish to capture Eleven's buzzed-cut look from season 1 (and your hair isn't already cut short), then you'll need to either shave your head or create the look through special effects or a shaved wig. Below we'll take a look at each approach to give you and idea of what you may want to try this Halloween.

Option 1: Create Eleven's Shaved Style with Special Effects
First up is a makeup tutorial by Leigh Dickson Artistry. This special-effects method is a bit more advanced, but may be a fun weekend project to attempt as October 31 nears.
Materials Needed (Prep Time 2–4 Hours):
- bald cap (plastic or latex)
- hair gel
- adhesive (Pros-Aide or spirit gum)
- makeup (foundation, eyebrow pencil, mascara, blush, dusting powder, etc.)
- paint
- stippling brush
- a helper (optional)
Again, this is an advanced tutorial. If you do attempt it, you can always try a less intense makeover and simply look to this as a source of inspiration. For instance, instead of Pros-Aide adhesive, which the professionals use, you can use the more common spirit gum, which is readily available from your local Walmart, Party City, seasonal Halloween store, online, etc.
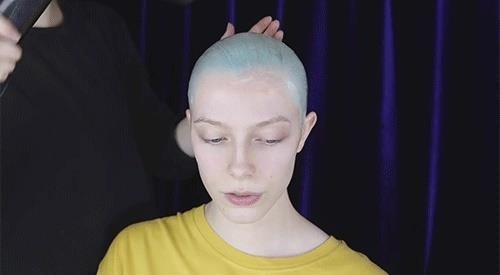
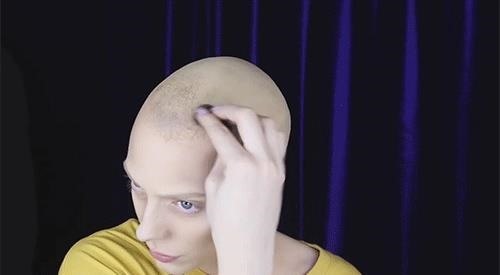
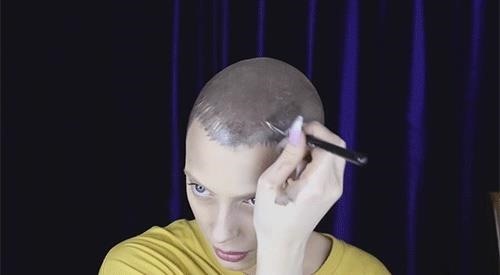
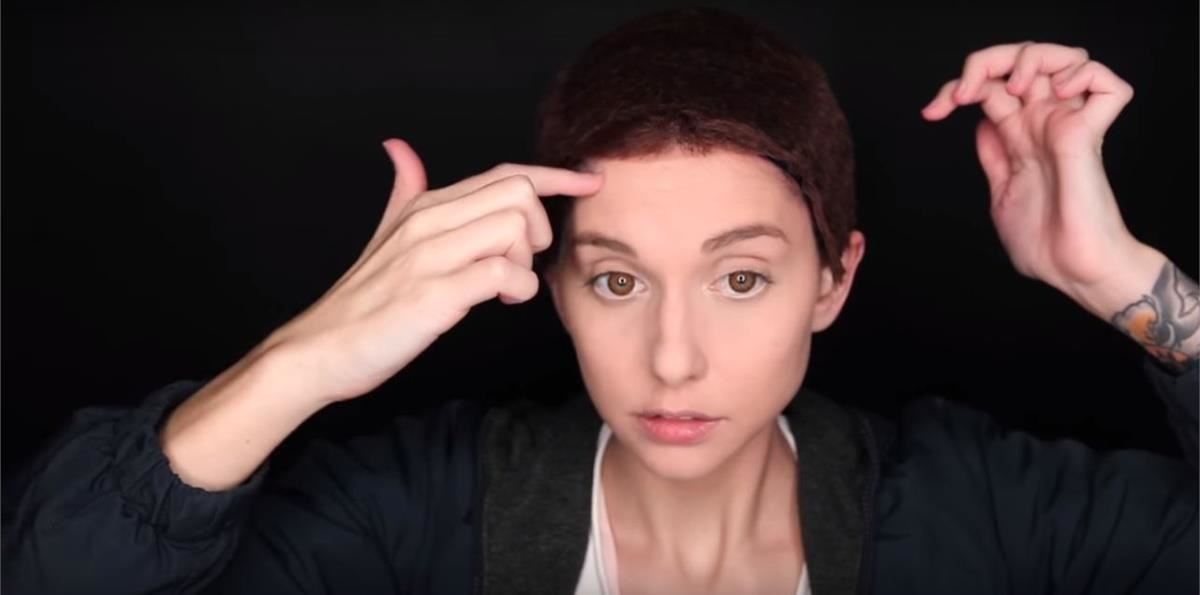
Step 1: Get Your Hair Ready
The basis for this Eleven costume makeover is the bald cap, and to work with one, you'll first need to get your hair as flat as possible. Using hair gel, smooth the hair completely down. For longer cuts, try overlapping the hair as Leigh does with hers, or tie a low ponytail and tuck it underneath — any way you feel gets your hair flat enough to pull a bald cap over.
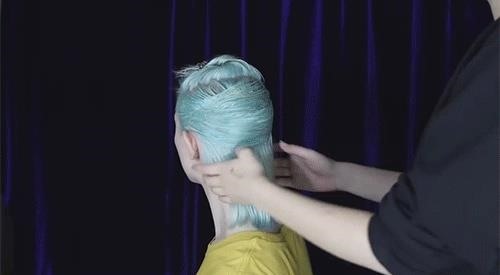
Step 2: Pull on Bald Cap & Glue in Place
For the bald cap, you can use a plastic or latex one. If you're allergic to latex, definitely look for the vinyl/plastic kind, which is what Leigh uses in her tutorial.
To apply, place the bald cap over your head and stretch it over your hair (this is again where a friend can come in handy). Once on, trace your hairline, making sure it's about a half-inch to an inch beyond your normal hairline. (You don't want the adhesive to get on your hair.) Next, simply cut away the excess, following the traced-on line.
Next, glue the bald cap to your head using your adhesive. Starting with your forehead, peel the bald cap back just enough to apply the Pros-Aide or spirit gum. Then go all around your head. Tip: Use a blow dryer to speed up the process as the heat will make the adhesive tackier in less time.
For the back of your head/neck, make sure the bald cap is glued on securely but not too tight. If it's too tight, it will rip when you move.
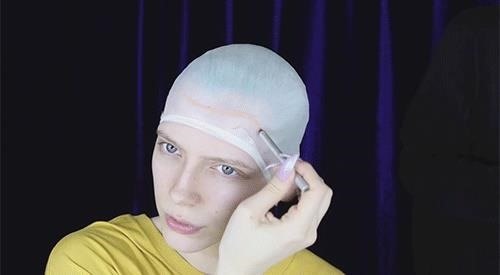
Step 3: Blend in Edges with More Adhesive
Once the bald cap is on, apply more of your adhesive over the cap, which will make it easier to paint on, as well as blend in the edges to your skin. For this step, again use a blow dryer to speed up the process. As Leigh says, "Blow dryer is your friend."
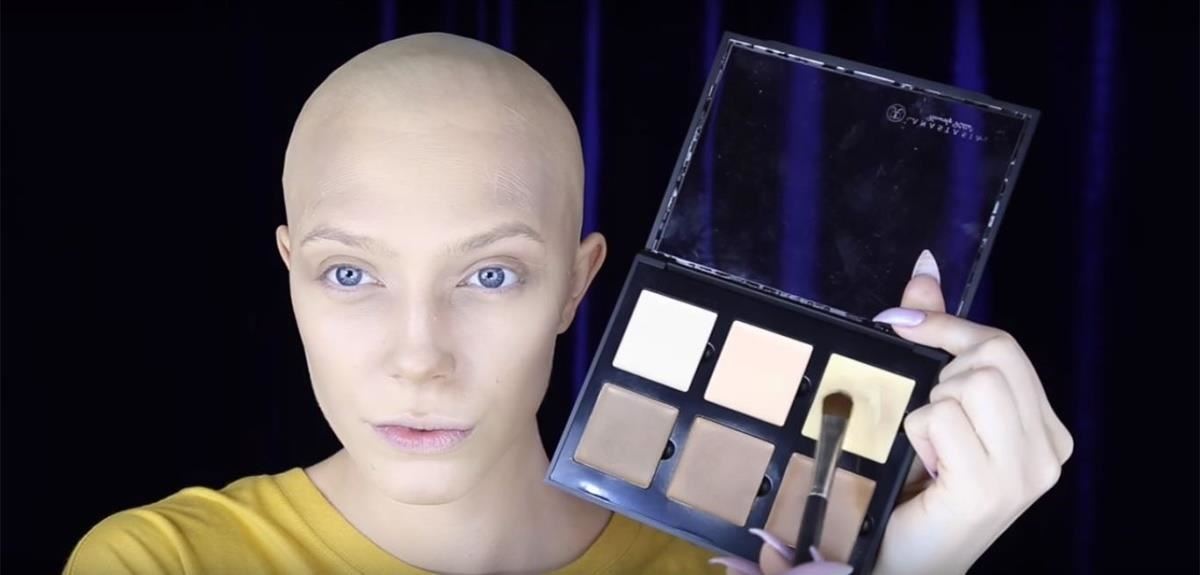
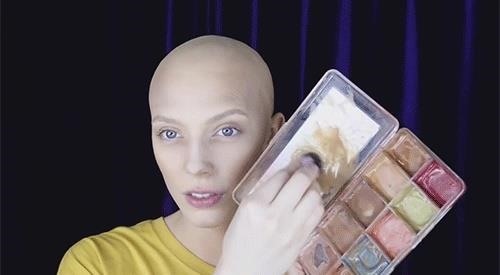
Step 4: Apply Face Makeup
This step will be different for everyone as you can do as much or as little as you want with your face. The big makeup part of this Eleven costume tutorial is the hair. As for that hair, Leigh dusts setting powder all over the cap to remove any remaining stickiness.
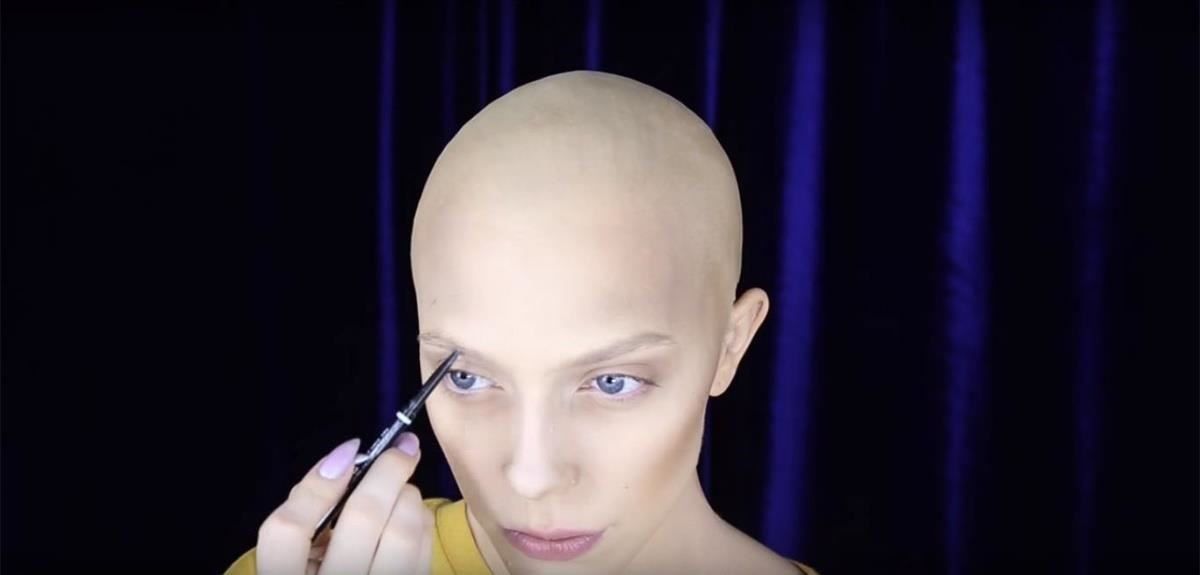
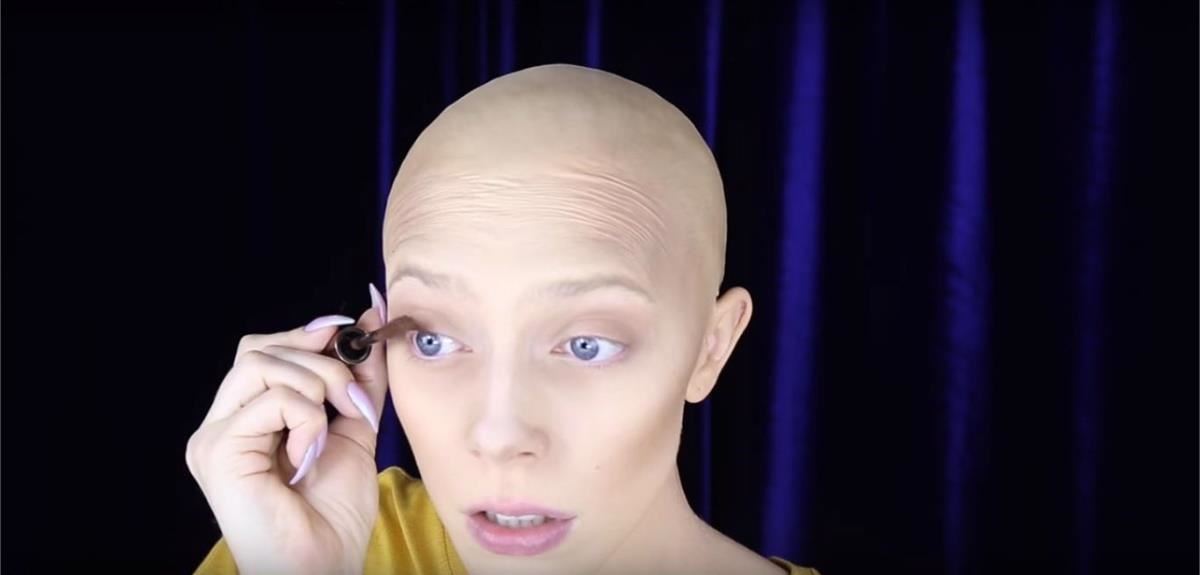
For the face, start with foundation and go from there. Reference a picture of Eleven while you're creating your face, and keep in mind that her look is above all else natural. Wipe away any makeup from your lips to create a real contrast, and add a bit of mascara. That should pretty much do it.
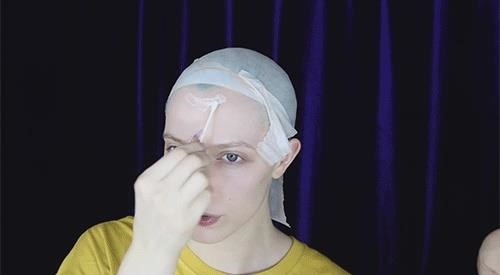
Step 5: Stipple in the Hair Base
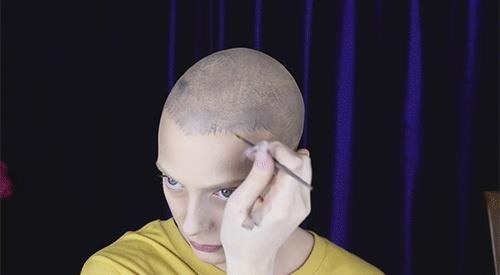
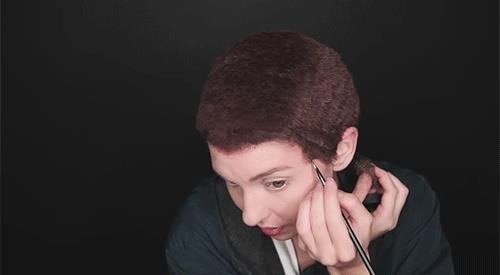
This step will again be up to you and what you come up with for your bald-cap canvas. Leigh uses professional supplies, such as Skin Illustrator, but you can use your own art supplies. Take a look at what she does for ideas. The key really is "stippling." To make it look natural, stipple the paint on.
With Skin Illustrator, an alcohol-based paint, Leigh begins by mixing a muddy brown color and stippling it all over the bald cap, marking out where the hairline will be. She then uses Kryolan rubber mask grease (another product used by professional makeup artists) to stipple on a mix of grey, beige, skin tones, to create the hairstyle's base.
Step 6: Paint on Hair Details
As Leigh notes, Eleven's hair isn't a straight buzz-cut; there are some longer hairs to frame her face. Using a paint brush, simply add in these details. You can use a sponge for the top/back of your head. Note that this part will take a good while as you try and get the look just so. "It's probably the most complicated part of the whole look," says Leigh. "And you basically just have to feel it out."
After the base color is complete, use white paint to create highlights — flicks for light, definition, and shine. Once you're happy with your design, go over the cap once more with a stippling brush to make it look more realistic (and take out some of those brush strokes).
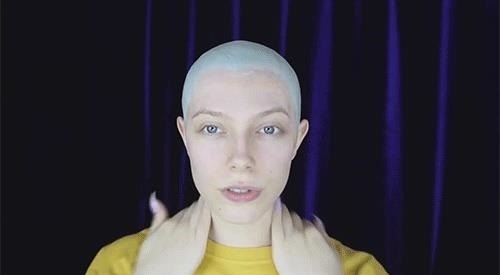
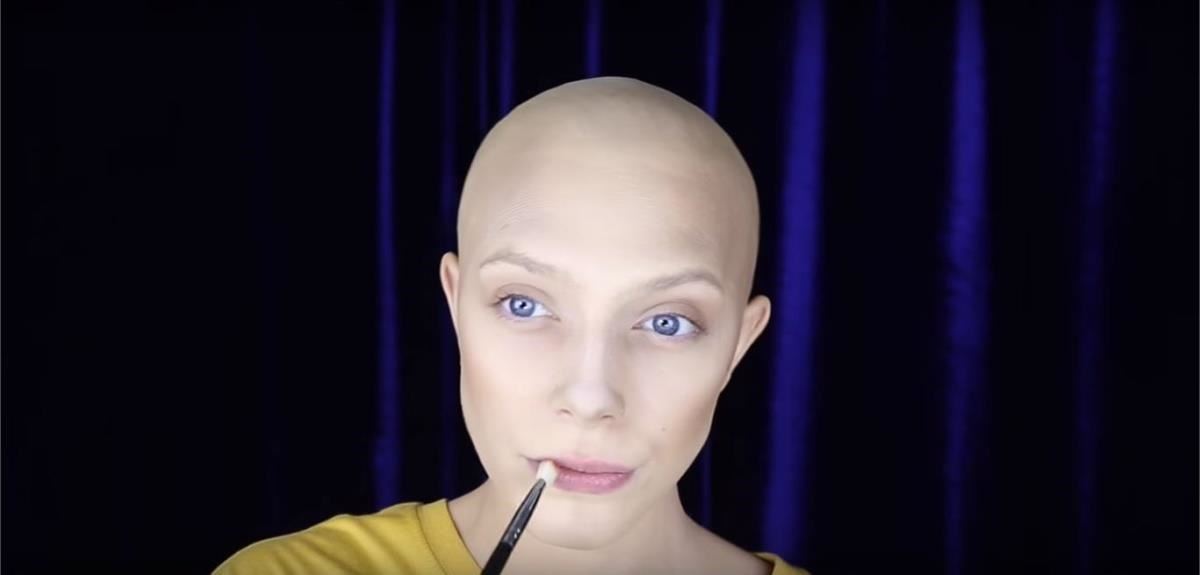
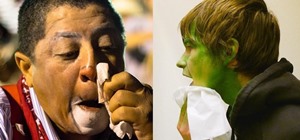
Step 7: Add a Fake Nosebleed
Lastly, to finish off this Eleven makeover, add a trickling nosebleed. Leigh used dark drying liquid blood for hers, but you can use your own fake blood mix (perhaps one made from corn syrup, cocoa, or hair gel).

Option 2: Shave Down a Wig to Get Eleven's Buzz Cut
Now if you don't feel like your stippling skills are at the level needed to paint a bald cap, then consider a shaved wig instead. YouTuber Alexa Poletti weighs the pros and cons of each approach and comes out in favor of the wig. To create this wig though, it's a little more involved than you may think.
Materials Needed (Prep Time 2 Days):
- two wigs (dark brown)
- tacky glue
- scissors
- straight pins (with balls on the end of them)
- hair clips
- comb/brush
- seam ripper (or tiny scissors)
- clippers
- wig cap
- makeup: liquid lipstick, brown mascara, eyeliner (for the hairline)
As Alexa points out, this method has a few pros in its favor: it's more realistic-looking up-close, it doesn't restrict your facial expressions, and it's easier to create. You can also reuse it. As for the cons, it does require longer prep time, is more expensive than a bald cap, and looks less like a buzz cut since no skin will show through. With all this said, let's get started on the process, which will basically be to combine two wigs into one so that it can be shaved down as short as possible.
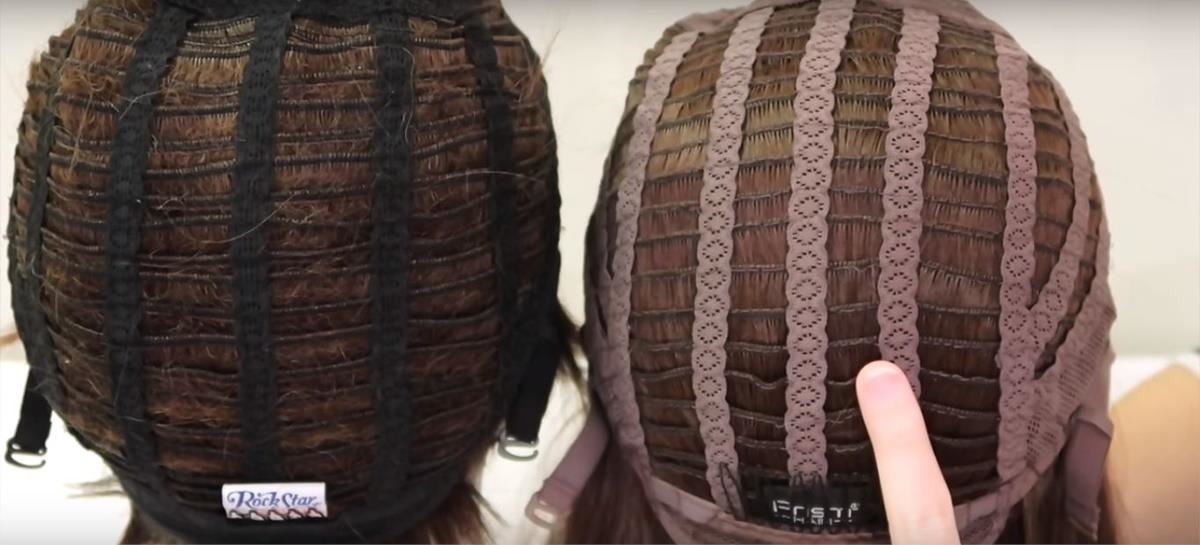
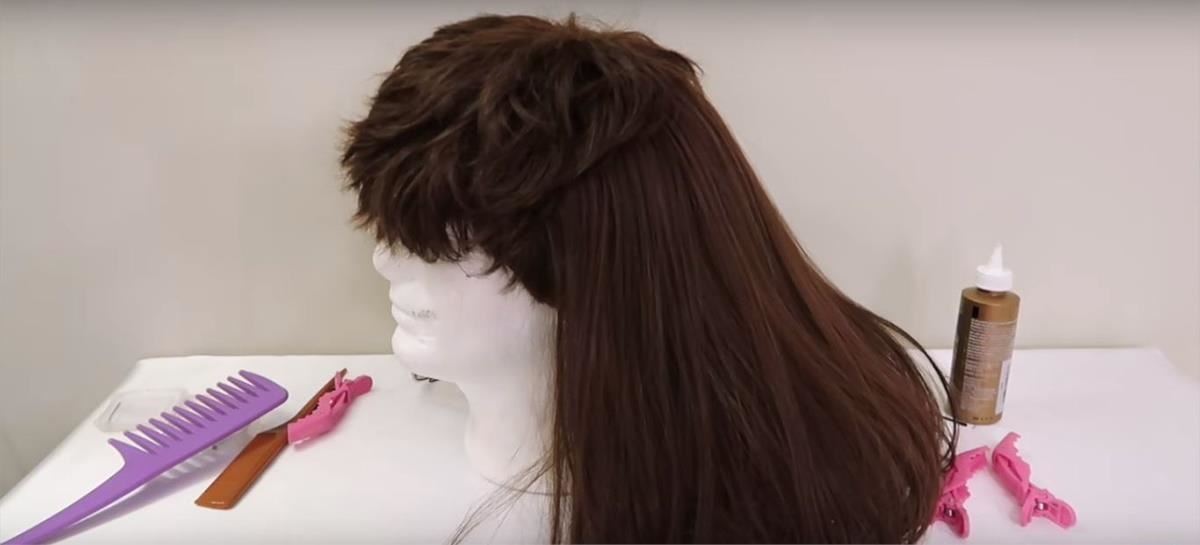
Step 1: Choose Your Two Wigs
To shave a wig, you can't simply take your scissors or clippers and shave it all the way down. In wigs, the hair of one weft "covers up and fills in the gaps" created by the weft beneath it. Essentially, they're layers. So, if a wig is shaved, the space between the wefts will be visible. To solve this, you can add harvested wefts from a second wig to make your primary wig thicker for clipping.

Note that since you'll be shaving this combination wig, the length of the wigs do not matter. The most important aspect of each is that they're of a similar color.
Step 2: Deconstruct the Second Wig
How again do wefts work? They go across horizontally and are attached to vertical, stretchy bands. The wefts are secured to these bands by a little thread, which is what you will remove in order to free the weft from the wig.
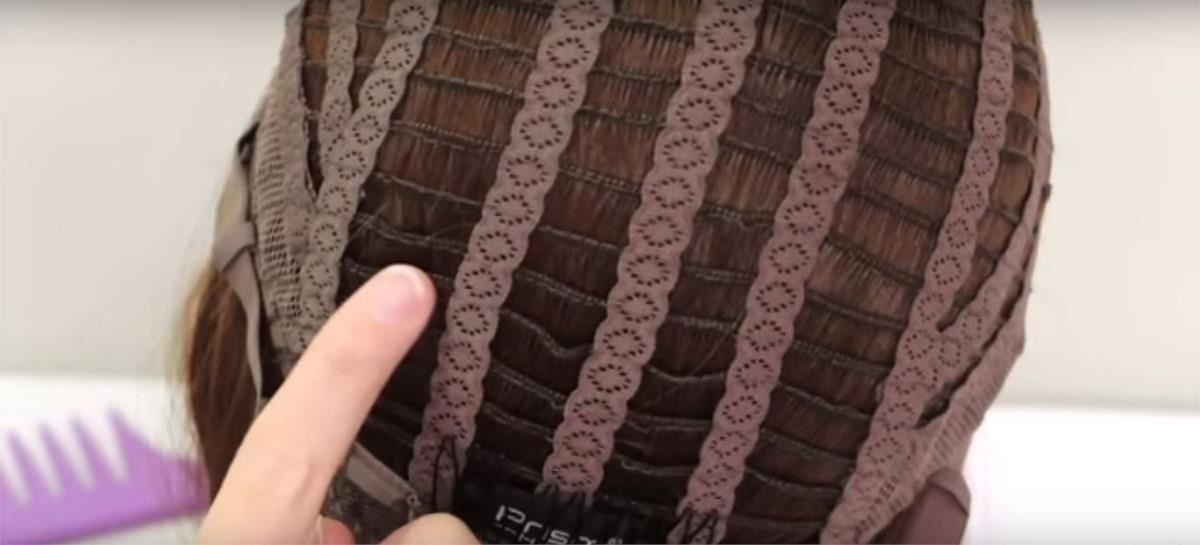
As the tutorial explains, start at the bottom and harvest one weft at a time using a seam ripper or tiny scissors.

Once the wefts are all removed from the second wig, you should be left with something like this:
Alexa notes that if you feel the harvesting process is too tedious, you can always buy hair extensions and section them into smaller wefts.
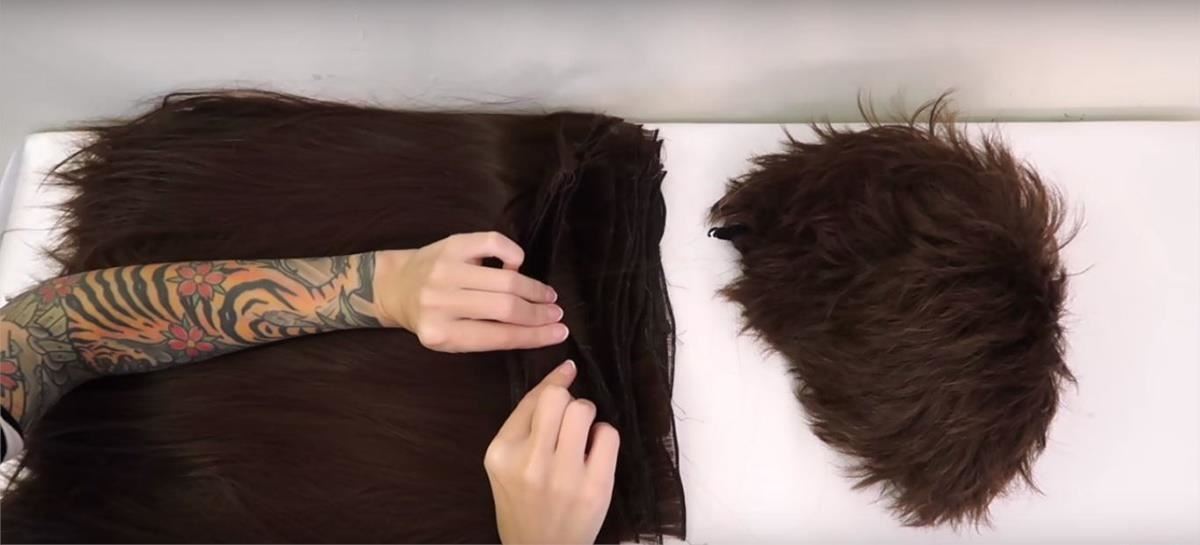
Step 3: Attach the Harvested Wefts
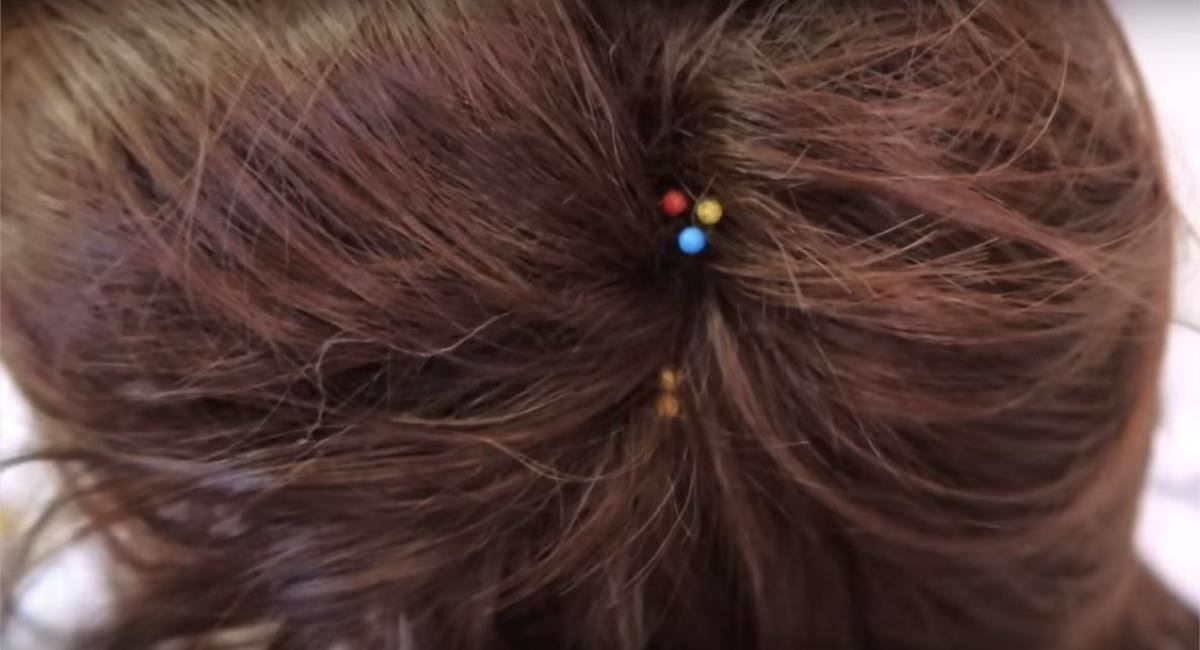
Now, to create the combination wig for your Eleven costume, fill in the spaces between the wefts on the primary wig. To do so, it's the deconstruction process in reverse: this time you'll use glue to attach the wefts and straight pins to keep them in place.
Starting on one side of the primary wig, part the hair along a weft to reveal the vertical, stretchy bands. Use hair clips to keep the row clear. Place a dot of glue on a band and add a harvested weft. Secure it in place with a straight pin and move on to the next band until you reach the other side. Do this for the whole wig, from the bottom to the top.

In Alexa's case, the primary wig's top was already quite thick, so she stopped once she reached the crown. Leave the wig alone overnight.
Step 4: Shave the Completed Wig
After sitting overnight, your combination wig should be all set for shaving. First order is to pull all the straight pins out. Then, with a pair of scissors, cut away much of the hair. It doesn't need to be styled at this point.
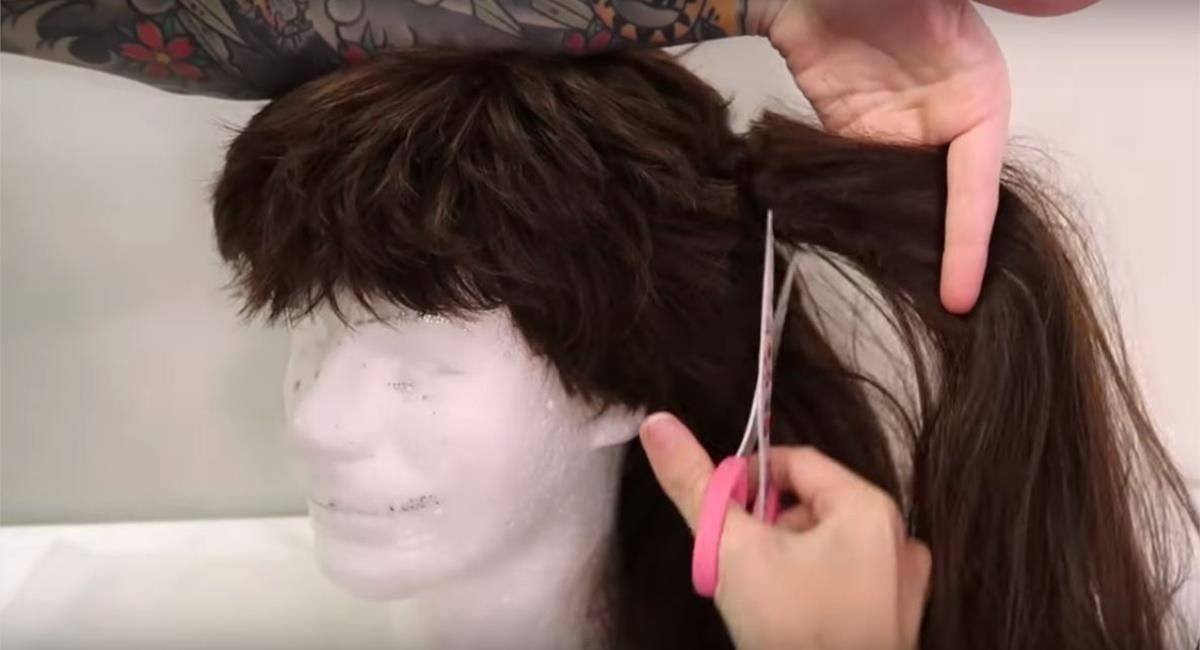
Once the wig is short, it's time to make it even shorter. You can continue to use scissors, but it will take a while and will be difficult to get it even all the way around. Instead, use hair clippers and when you begin, start out with a longer blade. (Remember, wig hair won't grow back!)
Alexa starts with a 1/2" blade and continues from there. As you cut the hair away, you'll know how short you can cut the wig before wefts show through. If all the spaces are filled in, you can cut it pretty short. In the tutorial, the final cut is made with no guard.

Step 5: Create a Hairline Like Eleven's
Finally, the last step for this DIY Eleven buzz cut is to put the wig on and add a hairline.
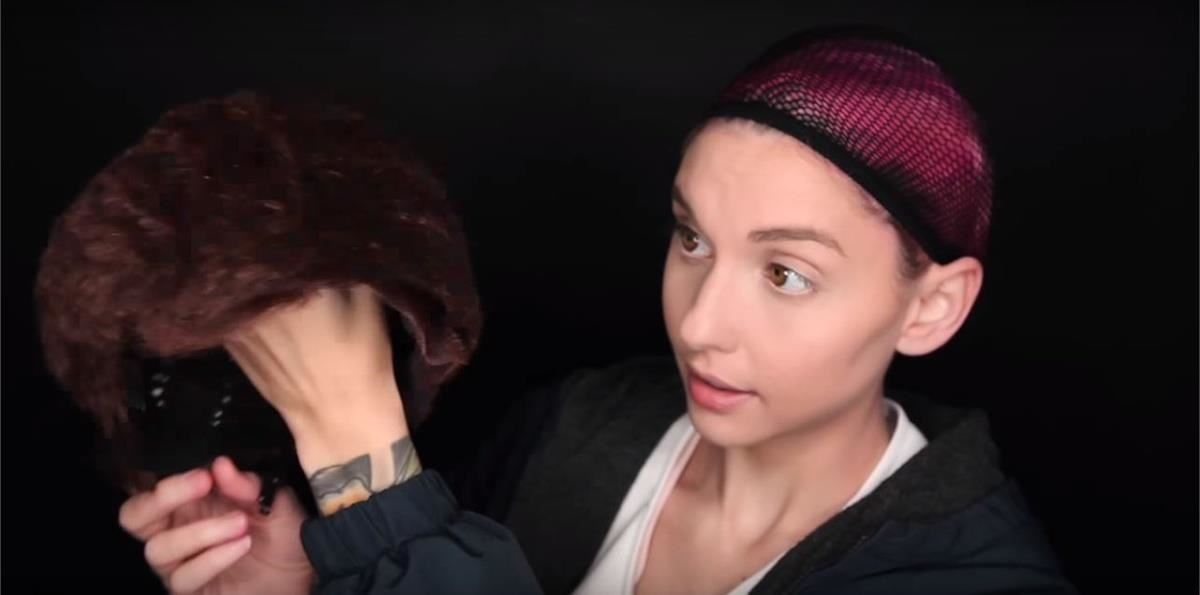
As Alexa notes, the wig's hairline will not match that of Eleven's, so turn to makeup. With liquid lipsticks, brown mascara, and eyeliner, you can easily create a new hairline. As with our first makeup tutorial, this step is really up to you and what you think looks best given how your wig turned out.
What Would Eleven Think?
And there you have it, a few different ways to go about becoming Eleven for Halloween. Of course, in season 2 of Stranger Things, Millie Bobby Brown will be rocking a very different hairstyle, one that's even easier to pull off. As Brown told Interview magazine, "I'm cool with people dressing up as Eleven for Halloween. I definitely want to open my door and give them candy." Cool!
Just updated your iPhone? You'll find new emoji, enhanced security, podcast transcripts, Apple Cash virtual numbers, and other useful features. There are even new additions hidden within Safari. Find out what's new and changed on your iPhone with the iOS 17.4 update.

Be the First to Comment
Share Your Thoughts